
Search the Community
Showing results for tags 'smart humidor'.
Found 1 result
-
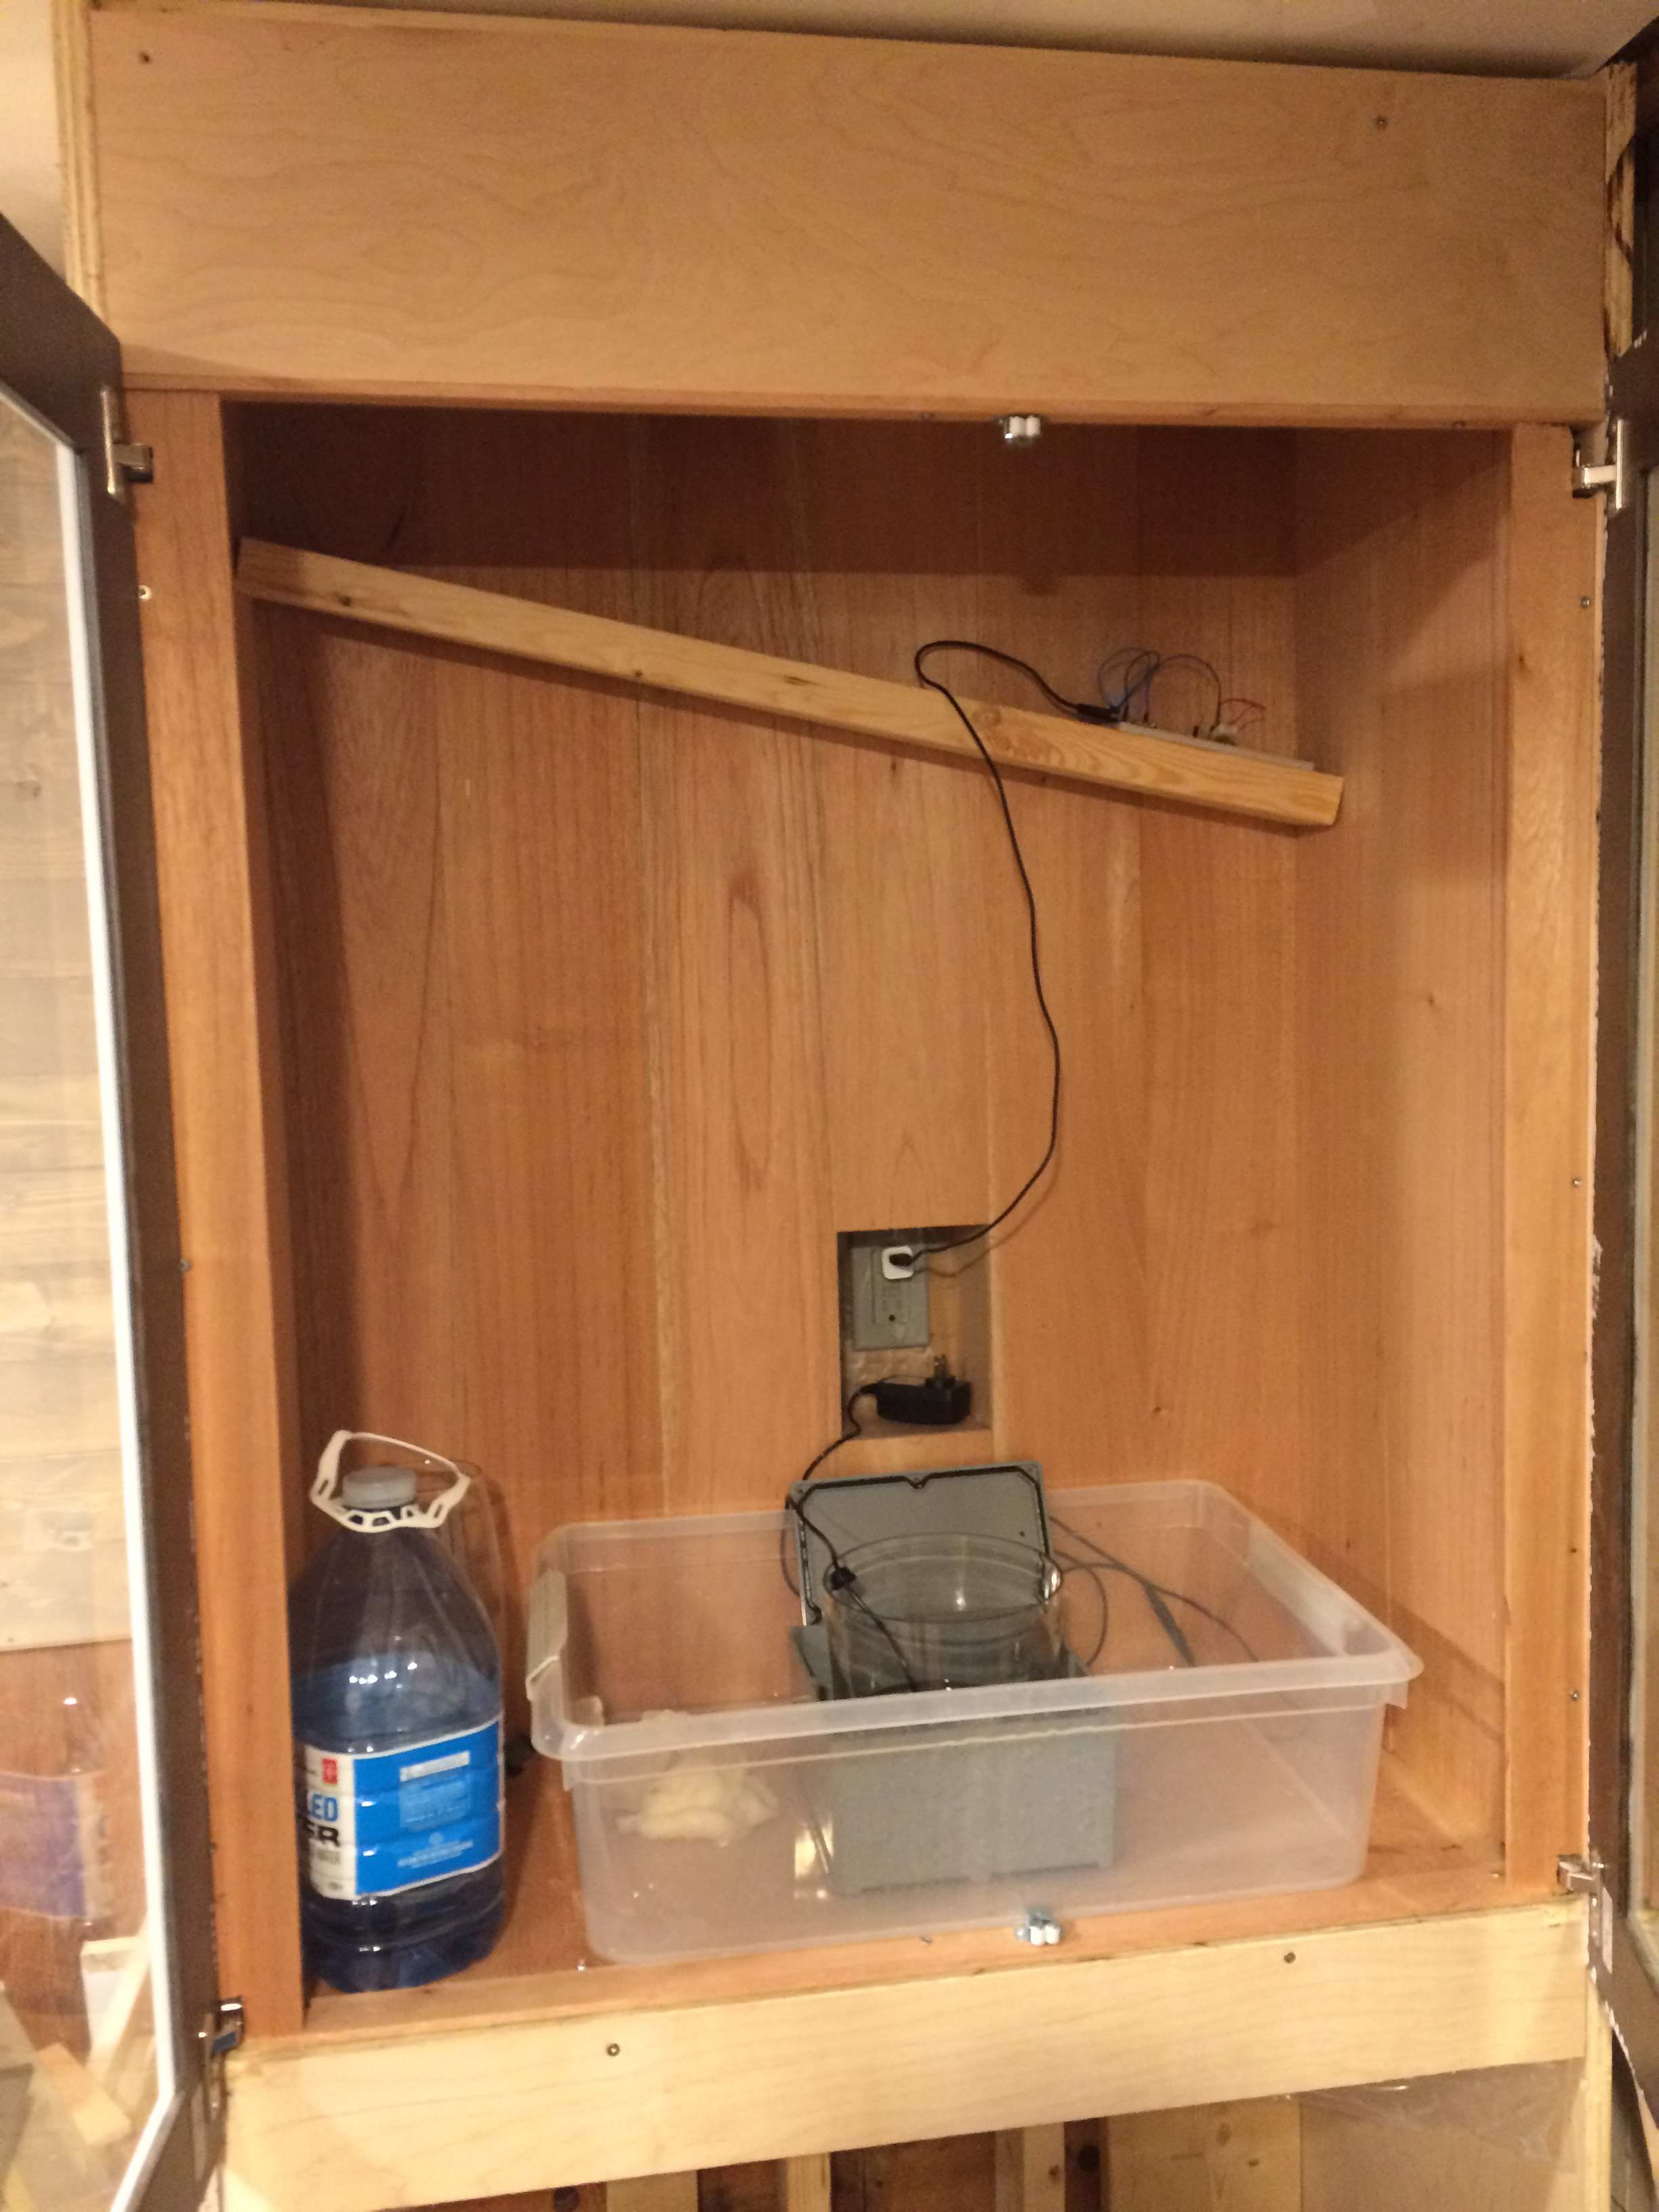
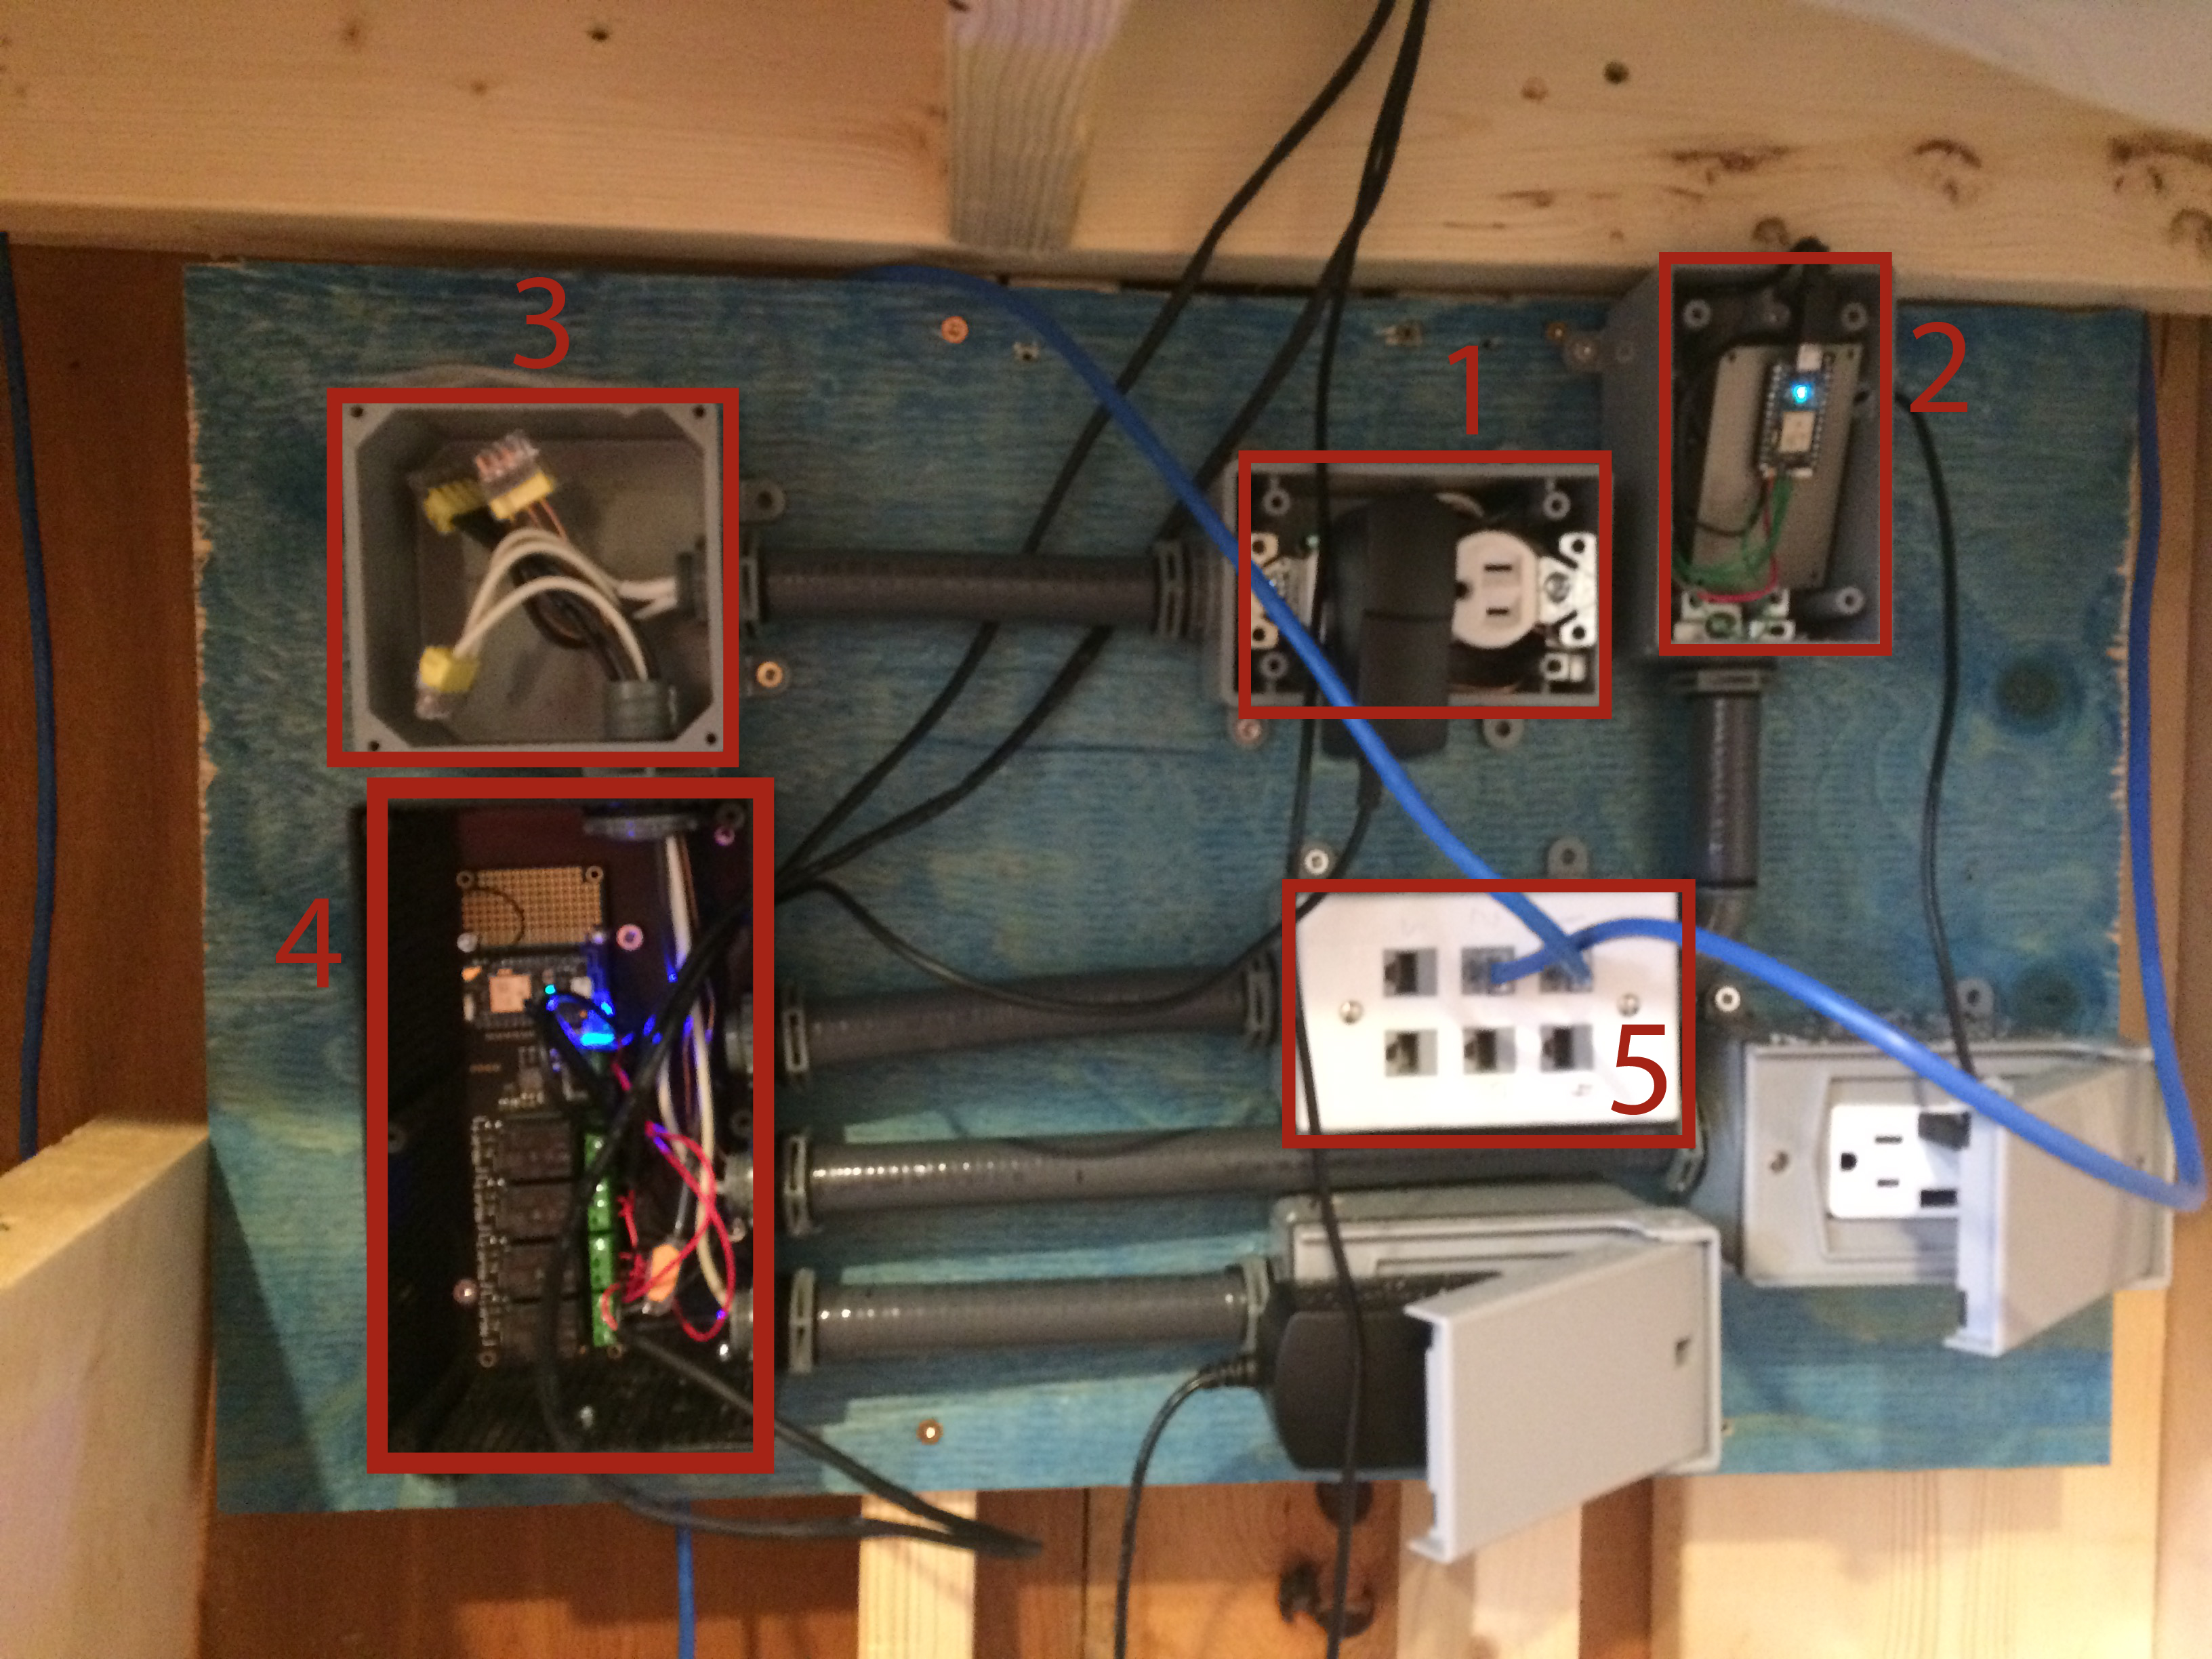
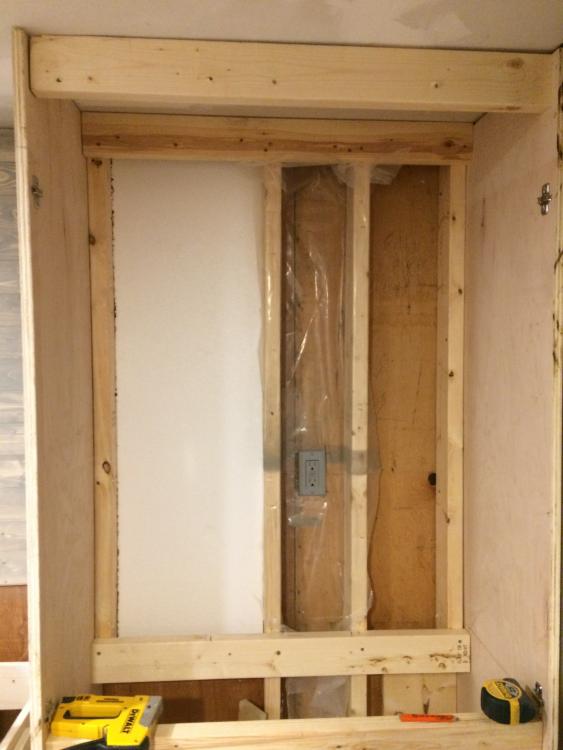
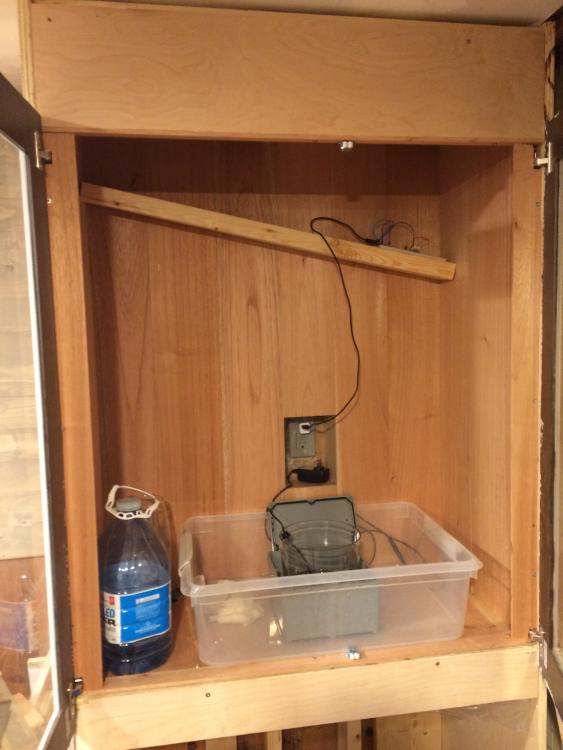
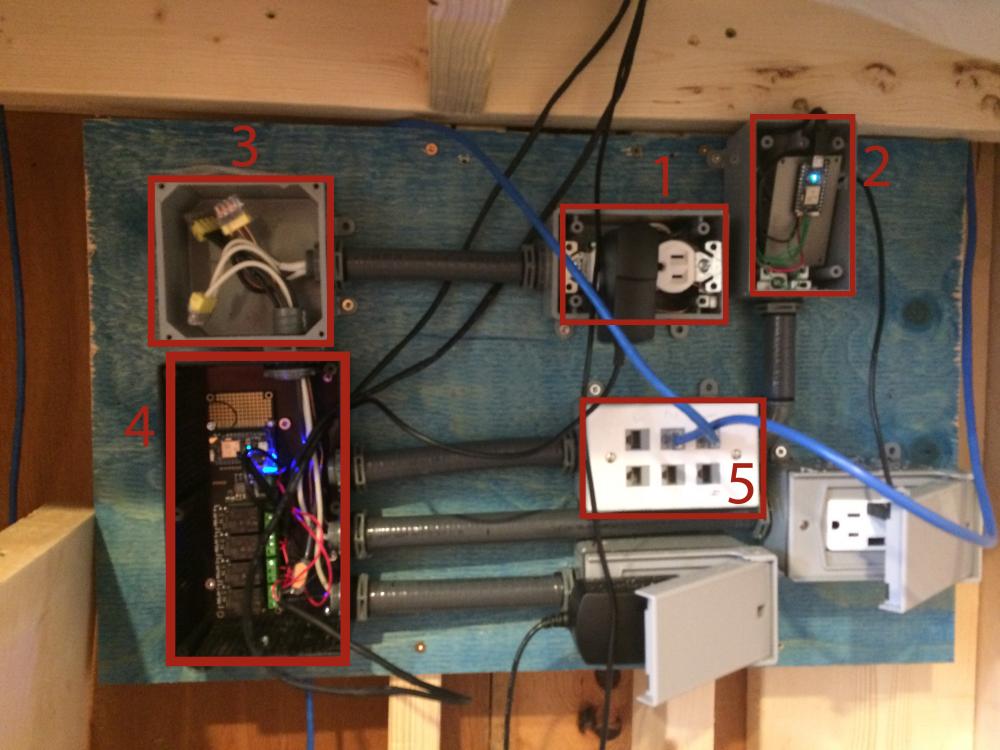
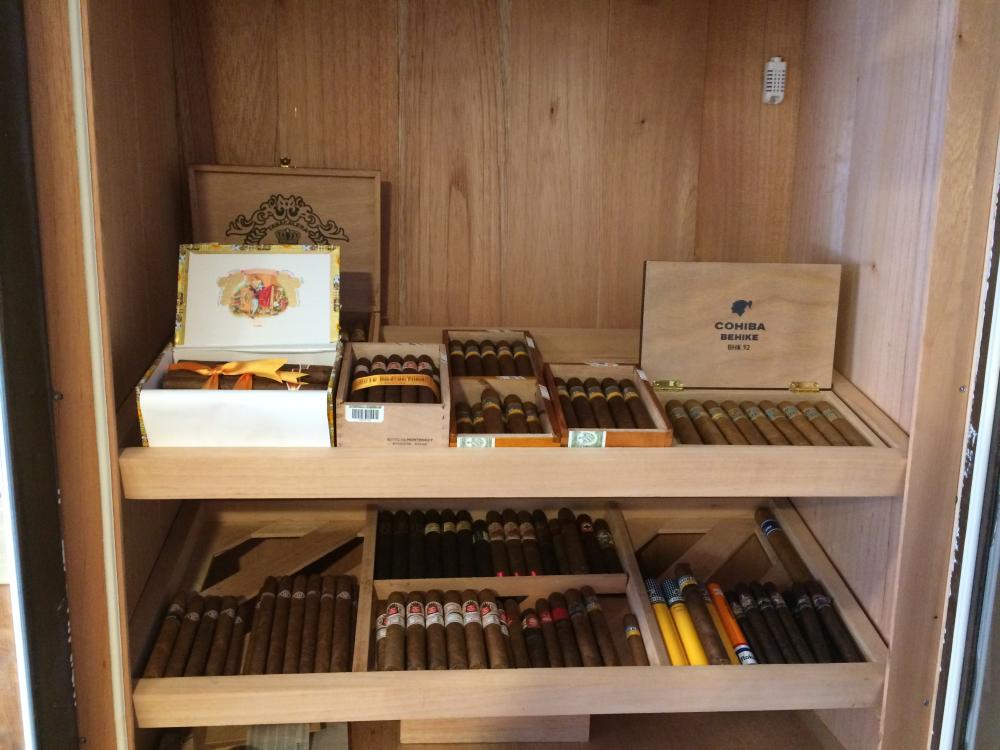
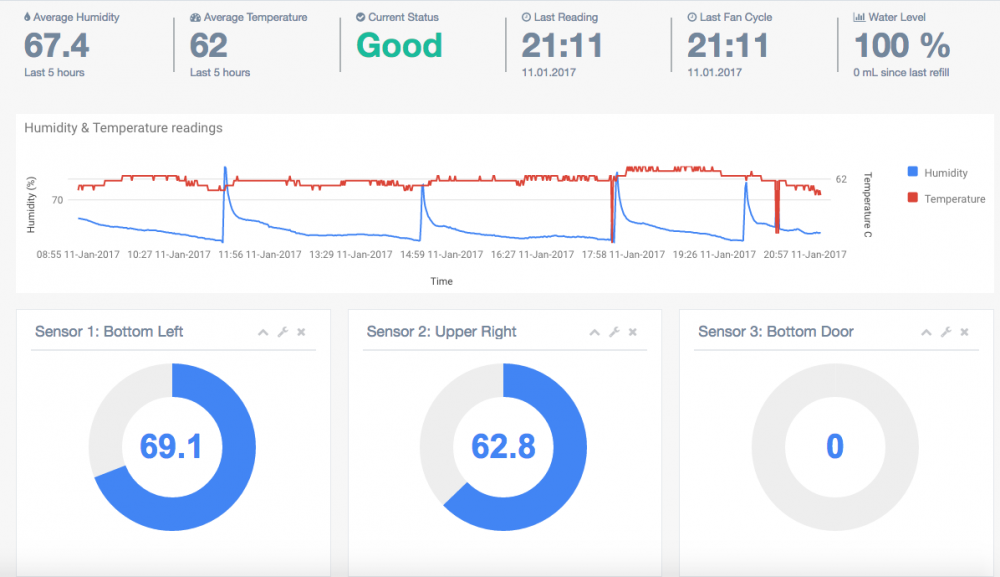
This might turn into a very long post, but I wanted to share this build with everyone in case you are thinking about doing something similar. I'm going to keep this very high level, if you have questions, just let me know. First and foremost, I am just a marketing nerd that knows how to build webpages and code. My garage turned into a workshop a few years ago and I do as much woodworking when I have some free time. Background I have 3 humidors in various parts of the house and recently my daughter started to use one as a step stool, and I decided that I needed to consolidate everything into one location for many reasons. The second reason why I wanted to take on this project is because I wanted to make my humidor fully connected and smart. I want a system that I could check in without having to be at home, it needed to be fully automated. The other reason for building vs buying is that what I wanted in a humidor comes at a high premium. I looked at the Gerber One, but those things are way out of the budget. Round 1 Around May I started out modeling the first build around the principals of the Gerber One, and built a cabinet that was going to be a piece of furniture. I had an idea of the basic build, but had way too many competing ideas running through my head, daily design changes, new features to be added. Long story short, things were spiraling before even getting started. So I took a break, during which time I built a 500 sq ft deck, and dislocated my kneecap playing soccer. That was my summer... Round 2 A few months ago I started to renovate my office and decided that I was going to make a built-in humidor instead of a piece of furniture. I started to pair down the list of features and simplified things significantly and started to map out the automation process to help with the planning process. This was the first concept I put together. The brains of the system Once I had the concept in mind, I started to look for wifi enabled micro controllers that could make my vision a reality. After researching many different products and options, I decided to use the Particle Photon. This lightweight dev board was perfect for what I needed. It was built on Arduino, and designed for IoT projects. I got two Photon's, one to use for the sensors, and one to control the humidification and fans using wifi enabled relays. What was needed now was a whole lotta code and connecting the sensor data to a web service. I decided to use AWS for all of the data, API connections, and configuration. Once again I needed to map out how all the services would need to connect to one another. This is why I chose to use AWS, it was one platform and I didn't need to patch many services together. Below is very simplified mapping that helped to break down the coding in sections. I tackled one element each week essentially. All said and done I have about 7 individual programs, 5 triggers, created 15+ API endpoints, 6 or so webhooks, error logging, and even SMS alerts. In order to make all of this possible, I had to create a user profile for myself and set my tolerances, sensor calibration values, and ideal humidity settings. With all of this information I created a program that figures out when the fans need to kick on to recirculate the air. I am further refining it and had to take it offline. The Build Now that I had a plan in place, I started writing a whole bunch of code during the evenings and testing things out. On the weekends I would work on my office and started to build the cabinet. I didn't take many pictures at this stage, I just pushed right through. I essentially built a box within a box within a box. The exterior plywood shown here is a no-VOC plywood with Maple veneer. I lined the entire cabinet with 6mil poly (the stuff used as a moisture barrier in home construction), then added blu-wood, a moisture resistant treated plywood. Blu-wood is very safe to use, and used in wet locations like bathrooms or basement construction. The idea is to use the poly as a way to seal the cabinet, the blu-wood allowed me to glue the Spanish Cedar. All in, I lost about 1.5" of interior space. Lined with Spanish Cedar. The thing in the top corner is actually the sensor in prototype phase. The electronics of the humidor are all mounted below. I didn't want to take up too much internal space with all of this. Here's what everything does: Main power. This is used to power the wifi unit of the Relay Shield and provide AC power for some of the relay circuits. The sensor unit. All Temperature and Humidity readings are sent by this unit and connect to #5 This is a junction box that splits the AC current to the appropriate relays. The relay shield that powers the humdification, fans, and any other electronics. In some cases the relays are powering 12V DC for the fans, and in other cases the relay is powering an AC plug The bottom outlet is powered by the relay. Sensors are connected using Power Over Ethernet PoE. I have about 500' of ethernet cable and a few hundred ethernet ends so I decided to use that for the sensors. This allows me to scale the number of sensors without having to take anything offline, plug and play. I just rig up a new sensor, and plug it in. Instantly readings come through. It's only 3.3V so it's very low power. This was the trickiest part of the programming, how to scale the unit with additional sensors. All of the electronics are connected through a GFCI outlet, if even the slightest short circuit occurs, everything is shut off by at least 3 failsafes since there is about 2L of water above the electronics. All of the electrical components are rated for outdoor use. I also need a few outlets for other aspects of the office remodel. Humidification I didn't want to buy a cigar oasis for a number of reasons. I know they are great units, but it just didn't fit my criteria so I started to think about building my own unit, and one day I got some inspiration. My daughter had a bad cold and the doctor suggested getting a cool mist machine to help her at night, he described it as a humidifier that saturates the air in a room with cool atomized mist. As soon as I saw it working I had to learn about the system. I quickly found what I needed and built a humidification unit. It's hard to see, but there is mist being funneled out of the vent and pulled in by the fan. Once the humidity drops below my threshold, the unit cycles up for about 1 minute, and jumps the average RH by 10-12% quickly. At the current time, it takes about 3hrs for the humidity in the unit to hit my lower limit. I need to add some beads in the roof to help keep the humidity stable for longer. There is also a door open sensor that I built using Home Depot parts and a few ft of wire. If the door is open, the humidification will not turn on. Where I'm at now... With cigars. There is tonnes of room for expansion, and I still need to add in one more humidor worth of cigars. I just need to build another shelf and re-align these shelves. The dashboard is pulling in live data can update every minute or so. Right now I have it set to track the last 5 hrs, but I can adjust that to show as far back as I want. The bottom values are the sensor readings, I only have 2 sensors hooked up currently. The chart is actually a Google chart that is plotting the data from AWS, the humidity value is an average of the two units. The status is actually dynamic, so if the door is open, the status will change, if any element of the system that I built is down, it will indicate an outage, if water runs out, same thing. The fan cycle is actually disabled at the moment, so I am just pulling in the last reading value for the time being. Water consumption is another program that calculates depletion based on usage. Next Steps I am building an air filtration unit for the roof of the humidor that will pull air in, run it through a 3M filter and then circulate it around. I need a weekend of free time to finish this up. I have 4 more sensors coming in sometime next week, and once those come in, then I will rig them up. I have to make a few wifi sensors for a friend of mine, so I need to create a nice enclosure for the sensor and the wifi unit to be housed in. Once I get that in place I will apply those designs to my build. For those looking to build something similar Make sure you have things well planned out and understand how the data will flow from humidor to your data warehouse. I had the intention of building this to meet my needs, but started to think about how it would be built if it were an enterprise solution. This meant that I had to think through lots of scenarios and possible circumstances that could arise, as a result, the data component is totally scalable now. Right now I have a database of 20,000 readings in there, and the data gets delivered lightning fast. Make sure your data platform is solid. More to come as things get done.
.png.6064789b220d964d4a5cec0998add8f5.png)
.thumb.png.64cb44381524f2fd0142ce1d31d7caf9.png)

- 17 replies
-
- 3
-

-
- humidor
- smart humidor
- (and 1 more)

.png.03a21678f6057f12020d4b95dce40024.png)